(This article is 4th in a series on The Sprang Hairnet. Start reading from the beginning here.)
Now that we have a simple loom, the next logical step is putting some thread on it to work with, also called warping sprang! Here’s where design decisions really start to be made, even I knew I wanted to follow the same twist pattern as the archeological find.
Hairnet or cap? Choosing density of sprang warp
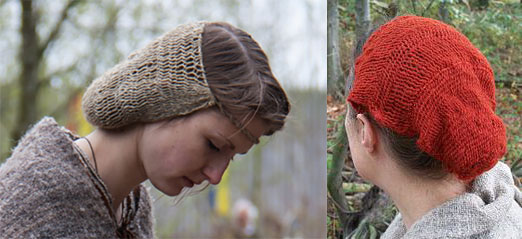
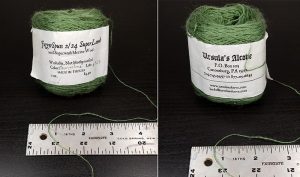
Although sometimes recreations of this hairnet look like the red one on the right, I decided I preferred the pretty structure of the fabric to show as lace like the one on the left. I chose my yarn accordingly – I happened to have this laceweight on hand from ages ago (JaggerSpun 2/24 SuperLamb, buy it here). I have found it to be pretty durable, and it has the advantage of being superwash, so it probably wouldn’t felt together while I was working on the hairnet.
I know, it’s delicate-looking, and I was terrified of breaking a thread, but it didn’t happen. More in the next installment about things I did to avoid breakage – on to warping!
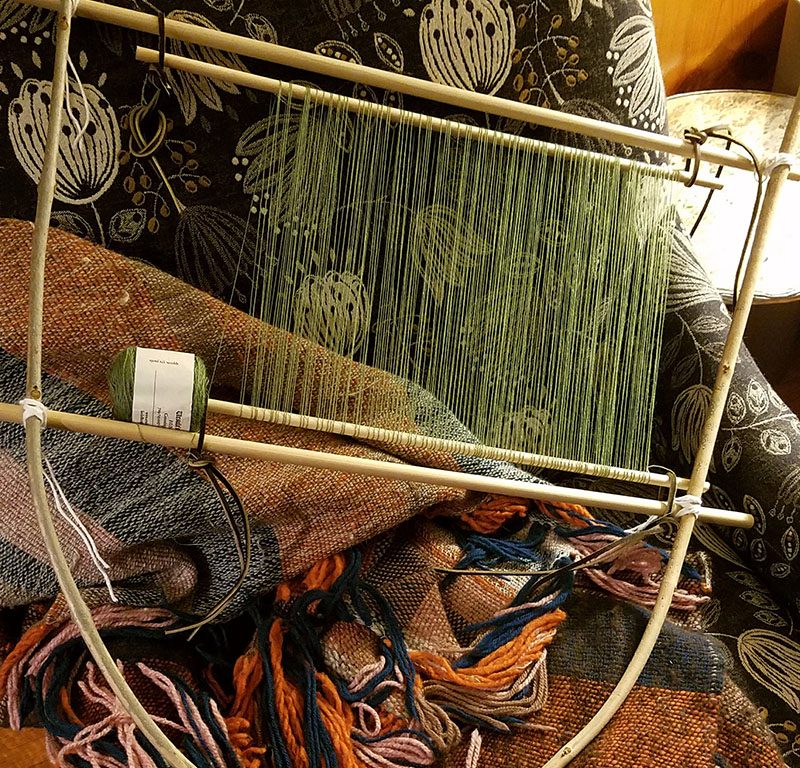
Warping Sprang on the loom
Here’s the drawing again from Margarethe Hald’s book, Ancient Danish Textiles, of the hairnet I wanted to make…

I examined this drawing very carefully when sizing my loom, and deciding what density of wrap to use on the warp. I decided that I needed 88 pairs of threads, based on how many pairs/inch I wanted to have (roughly 6), and the total desired width of the hairnet. So that meant…wrap the thread 88 times around the top and bottom bar!
Tip: Just wrap a bunch of times, as evenly as you can. Periodically stop and count. Be kind to yourself! Practice will make this step go more smoothly.
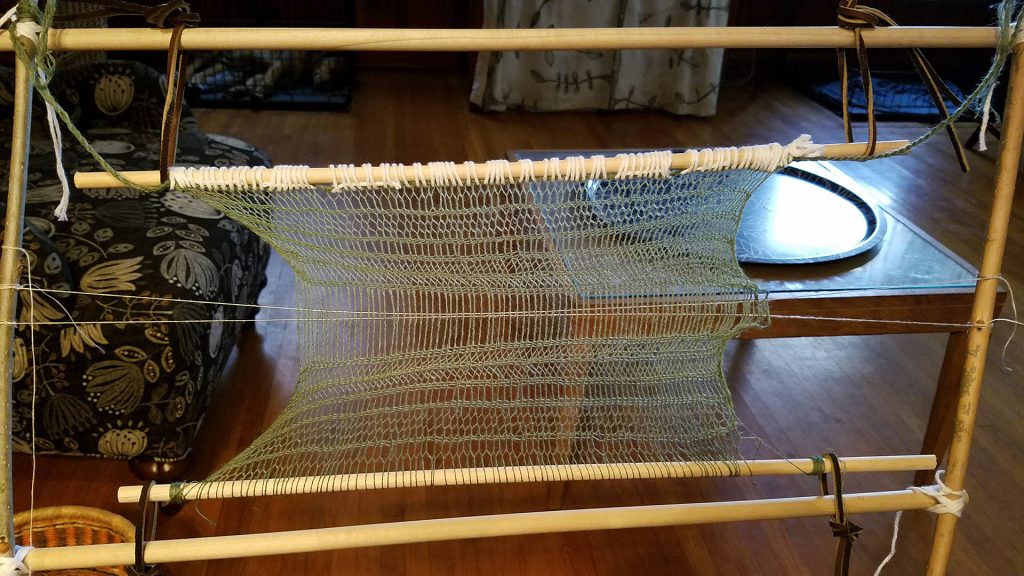
I wrapped the yarn around the top and bottom bar to create a warp. This is a different technique from cardweaving or from heddle weaving. Rather than measuring and cutting a multitude of separate strands, I had one long strand. I wrapped the laceweight yarn around and around and around the top and bottom bars. I did try to wrap in a regular rhythm, and to finish in one sitting with no interruptions.
Using a Navajo edge twine technique for warp spacing
That advice comes from the intriguing book Navajo Weaving Way, by Noel Bennet, which is full of great weaving advice and cultural beliefs surrounding weaving, extracted from an extant primitive weaving community. One of my concerns on making this hairnet was how to space the warp threads evenly. Navajo weavings are spaced by forming a two-strand ply cord around the warp threads.
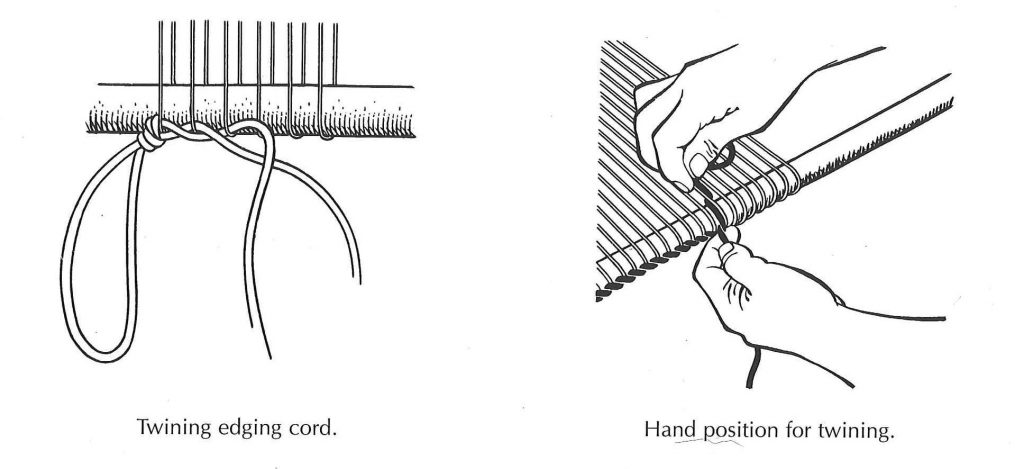
To accomplish this cord, I plied my laceweight yarn triply, and with each plied strand, twisted it and wrapped it around the warp. Now the spacing was secure, no matter how I manipulated the pairs of threads.
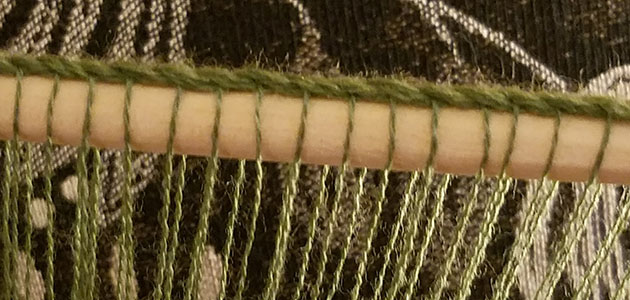
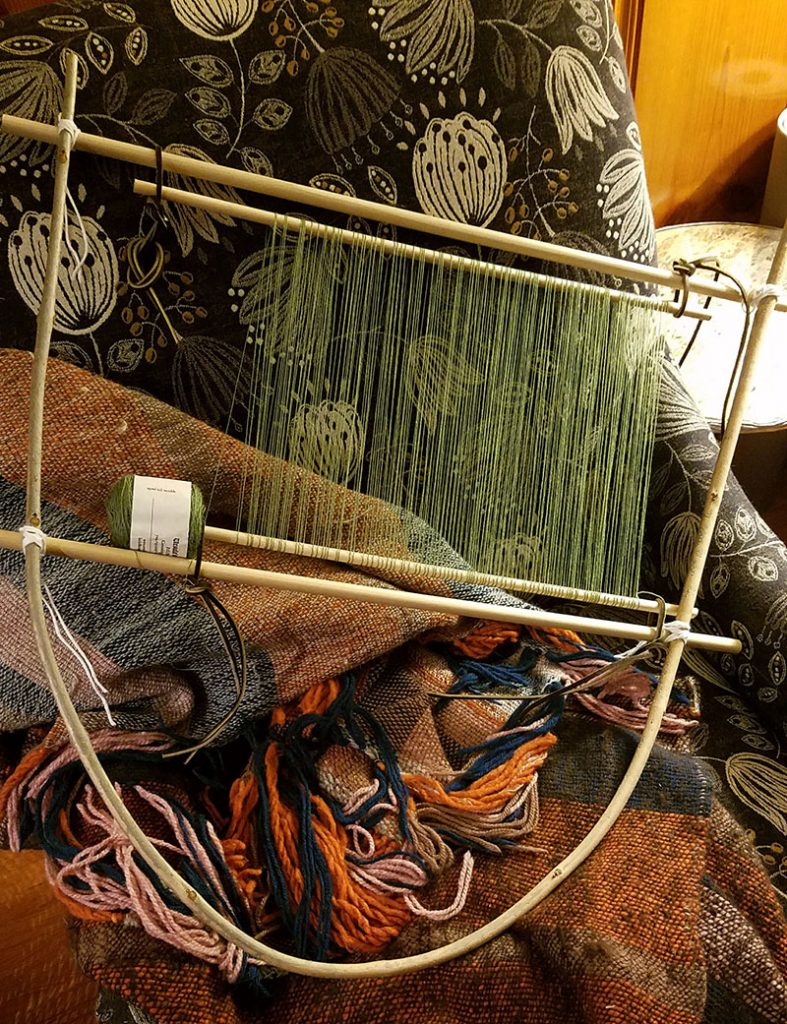
The cord technique has another advantage: By securing the spacing, I could move the cord to the top of the loom. The top bar was now filling only one function, that of pulling the warp, rather than spacing it. Consequently, I could pull the top pole out of the warp and not destroy the warp.
Therefore I did that. I untied the top pole from the top bar and pulled the pole out of the warp. I then used my frame assembly yarn to wrap the spacing cord onto the top pole again, but with the pole on the *outside* of the work.
Do you see the difference between the last two pictures? Look carefully at the white cord holding the work to the top bar. That green cord is now inside the general working frame, not on top of the dowel.
I chose this Navajo cord method for three reasons:
- I didn’t want the thickness of the bar to create a giant dead space at the top of the frame;
- The top of my hairnet needed a non-gathering cord anyway;
- Since I wanted to maintain a lacy appearance, I wanted to be sure my warp threads wouldn’t collapse together.
Also, I didn’t bother with it at the bottom of my hairnet for several reasons:
- I wanted to compare performance of the two methods;
- The hairnet should gather onto a cord at the base;
- The resulting giant dead space left by the bottom bar doesn’t cause a problem at the nape of the neck.
So if you’re following along, the warp is ready to start twisting! In the next installment, learn how to read the twist pattern in this piece. I’ll also compare this pattern to another sprang hairnet pattern.